List of miscellaneous things
ABOUT THIS PAGE:
This page is a place holder for miscellaneous projects and files over the years.
Particularly, it represents a glimpse on the amount of work that goes into testing light simulation software. Countless hours on researching the physics of light have been invested in the process. Can't say I remember most of that theory any more, but some of the work is placed here as a historical archive. Some of these files have also generated some interest in the past among artists and enthusiasts; so this page can serve as an access point for that purpose as well.
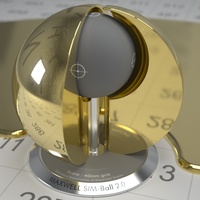
Materials Preview Scene - Standardized illumination and scale of materials
There was a time that each computer artist would present, or share, their render object materials using arbitrary illumination, scale, vantage point, and geometry. This made it difficult to assess materials accurately in how they would look or behave in other scenes. Often times they looked good only under the specific (sometimes unnatural) circumstances under which they were presented and illuminated.
The SimBall (as nicknamed) was developed in an effort to standardise material presentation and sharing. The scene was initially given exclusive access to NextLimit by Thomas An. (the creator) for adopting it into the Maxwell render ecosystem. As the owner and creator (Thomas An), later opened the license to anyone (with attribution).
Designed by:
Thomas Anagnostou
using Rhino3D


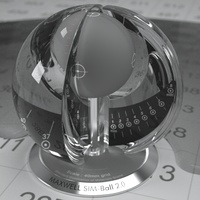
Materials Preview Scene Ver2.0 - Second version considered but not adopted
This is an alternate version of the materials standardized scene that was connsidered at the time but was not adopted. It makes no sense to introduce different versions of a standardized scene creating variants that defeat standardization in the first place.
Some people asked to try it so it's here for you to play with
Designed by:
Thomas Anagnostou
using Rhino3D

Dispersion of Dispersion - Passing the light from one prism to another
This scene was developed out of curiocity on how Maxwell Render would handle the scenario of a beam already separated into its component wavelengths passing through a second prism. Would the light simulator handle it properly ? Turns out that it does.
This scene has somehow sparked the interest of sevaral people over the years and was repeatedly asked to share it for testing in other render engines as well.
Designed by:
Thomas Anagnostou
using Rhino3D

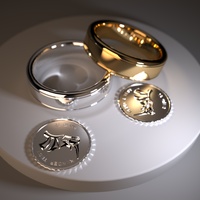
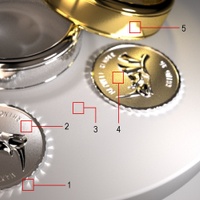
Metalic Object Caustics - Testing realism in light simulation of metals
There has been a lot of discussion and debate over the years on what is necessary to achieve realism in computer graphics. Before Maxwell Render, the computer graphics world was ignoring some aspects of light behavior, considering their effect neglidgeable and too computationally expensive. However, by trimming down subtleties, we also trim down realism.
This scene was created as a global render chanllenge for all render engines of the time (around 2005). The goal was to put everyone's philosophy to the test, by rendering this image in their favorite render engine and then have a blind vote on which ones are actually passing as photographs.
Designed by:
Thomas Anagnostou
using Rhino3D

Ambient Illumination Test - Indirect illumination stress test
This test was designed to stress the light propagation, via indirect illumination (of lambertian surfaces), of the Maxwell render engine.
It is a structure, illuminated from a single location and cameras are placed in three different rooms arranged by escallating level of difficulty. The very last room is completely enclosed and has a single hole on the wall from which light can pass through. This last room is a essentially a pinhole camera and we would expect to see an image of the previous room projected on the wall oposite the pinhole. This room (to my knowledge) is impossible to render with current render technology.
Designed by:
Thomas Anagnostou
using Rhino3D


Light Distribution Test - Experiment against photo
This test was designed to test the light propagation algorithm against a photo in a controlled experiment. Particularly whether the light distrubution would fall off at a reasonably similar fashion to the real thing; provided that the materials were chosen to be simple enough (in this case rough white paper) and lambertian (non shiny)
Designed by:
Thomas Anagnostou
using Rhino3D and
Canon A520 camera
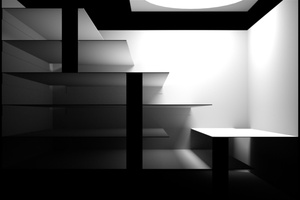

Internal Reflection Test - Light reflecting inside transparent material
This is an extremely difficult test that no current render engine (to my knowledge) is capable to resolve in a practical time frame. We get hints that the light paths are correctly calculated, but the image is too computationally expensive for modern day technology (possibly a render farm might be able to handle it).
The objective is for the collimated light beams (from the bottom left) to exit the glass block at the correct angles and register on the top grey card. The beams must also register on the grey card inside the block BOTH on the way up AND reflected down via total internal reflection. Finally the beams must be seen at the floor at intensities proportional to their angle of total internal reflection.
Designed by:
Thomas Anagnostou
using Rhino3D


Caustics Behind Glass Test - A difficult scenario
There is a scenario when light from a small source (such as a point light or a sun in a scene), sends rays passing through a glass, becomeing caustics, but do not pass-through back towards the observer. This happens to be a weak spot in physics-based render engines and this test exploits such weakness.
The objective is to use regular dielectrics (not AGS type of sortcuts) and be able to witness the sunlight inside the windowed gazebo. Problem is that the glass panes cast a shadow which is as dense as the walls themselves. Also the caustics thrown by the prisms and shiny labels on the floor are not visible on the mirror throught the glass pane. This is a very difficult scene
Designed by:
Thomas Anagnostou
using Rhino3D


Single Wavelength Indirect Cornel box - Pure Insanity !
This test is simply impossible on the current render technology known to man (as far as I can tell). If you try to render it, you will see just black / nothing. Make sure the emitter is ON behind the collimator to guarantee you are seeing nothing for the right reasons.
A collimated beam of light is being passed through a prism. The beam disperses to its component wavelengths against a wall. A slit on the wall allows a single wavelength to pass through to the other side. The single wavelength hits a cylindrical mirror. The mirror spreads the light onto a Cornel box underneath it. A camera is placed in front of the Cornel box hoping the render engine will actually illuminate it.
Designed by:
Thomas Anagnostou
using Rhino3D


Dielectric and Liquid - Photo callibration test
This test is performed as a callibration for the render engine's behavior in realistically representing dielectric objects (glass) and liquid.
A scene was constructed and then painstakingly reverse engineered as a 3D scene. Every object was measured to scale with +/- 0.1mm (their location in space within +/- 1cm) and the light source and camera vantage point was also matched. The objective is for the render engine to come as close to the real thing as possible
Designed by:
Thomas Anagnostou
using Rhino3D
and a Canon A520 camera


Dispersion Validation Test - Test whether the wavelengths are properly presented
This test splits a colimated light beam via a prism of known characteristics (Nd and abbe) and projects the beam to a wall. The spread is compared against a callibration card which is pre-computed via light theory. The objective is the render engine to match the mathematical model represented by the callibration card.
Designed by:
Thomas Anagnostou
using Rhino3D

